Wednesday, December 30, 2015

REASONS FOR AIR BLOWING THROUGH THE POOL RETURNS

Air bubbles in the pool return inlets means that your pump is not pumping only water, but also pumping air through the pipes too.
Air in the pool pipes is a problem because it causes poor water filtration when the filter tank and pump are half-full of air, which can quickly lead to water problems.
Air building up inside the filter tank could also be hazardous, if air pressure builds up too much, it can rupture the tank or tank clamp, and injure people nearby.
So, if you see air coming out into your pool returns, or you see air in the pump basket, it's time to take action!


10 REASONS FOR AIR BLOWING THROUGH THE POOL RETURNS
The air has to come from somewhere, and specifically somewhere BEFORE the Pump Impeller, air is being drawn into the pipe or pump. After the pump, the pipes are under Pressure and any void will result in water leaking out, not air leaking in. Before the pump, the pipes are under Vacuum or Suction, and any void in a pipe, fitting, valve or pump basket area, will suck air into the pipe/pump. Air that is pulled into the pump is then pushed into the filter and back to the pool returns, under pressure.
Here's the ten most common reasons for air in the system:
  1. Water level is too low, skimmer is sucking air.
    Solution: 
    Raise the water level to mid-skimmer.
  2. Skimmer weir is stuck, or objects are stuck in skimmer throat.
    Solution: Skimmer weirs can start to stick if the skimmer walls bow inward. If your weir gets stuck in the Up position, blocking water flow, remove it and try to shave off or sand off 1/16' on each side. You can also replace with a spring loaded weir that is just a bit less wide than the original part. For toys or rafts stuck in the skimmer, tell the kids again, to clear the pool of all gear after swimming. 

  3. Incoming valves (skimmer, main drain) are closed or partially closed. 
    Solution: This happens all the time, when valves are turned the wrong direction and block off too many incoming lines, and the pump begins to overwork, creating more vacuum pressure, which draws in air around the incoming valves or pump, areas that normally don't draw in air. Check that all incoming valves are fully open.
  4. Pump Lid is not tight enough, or Lid O-ring is missing or damaged.
    Solution: Also very common, you've got to really tighten pump lids very tightly after opening or removing the lid. Sometimes all it needs it another 1 inch of turn to make a full seal with the pump lid o-ring. Threaded pump lids usually have a notched top, to allow you to use a long bar or screwdriver to assist in tightening and removal. Clamp style pump lids just need to have the clamp fully tightened, until the assembly creaks and groans. And, I can't tell you how many times I've pulled off the pump lid, set it down, and the way too loose o-ring falls off, and I thread it back on the pump without noticing. Or it stays on the lid, but gets covered in pine needles or dirt which makes it hard to make a good seal. Check the o-ring for a good fit, and replace if it has dry-rot cracks in it. To maintain a good pump lid o-ring, twice per year remove the o-ring, clean with a rag, and lubricate (Teflon lube).

  5. Threaded pipe fitting going into pump is sucking air. 
    Solution:
     So common that I've written an entire post about this issue - but here's a summary. If the pump runs without water, or heats up in other ways, this can shrink the threads of the fitting that is threaded into the pump. Bad angles or excessive vibration can also cause the threaded seal of the fitting coming into the pump to loosen over time. You can make a patch with pool putty that will last for several months at least (leave the pump running for 24 hours to let the putty set up). Or, the other option is to replace the loose (and often shrunken) fitting with new.
  6. Incoming valves are sucking air, from loose lids or stem o-rings.
    Solution: 
    The incoming valves are the main drain and skimmer valves. After 10 or 20 years of service, they begin to loosen up, and can start to leak air around the lid or the stem that sticks up through the lid. For Jandy type valves, there are small o-rings for each that can be replaced with a good slathering of Teflon lube, to solve the problem. Occasionally a new valve diverter is needed, if the stem shaft has worn down. Ball valves can also have O-rings and Teflon seals inside to remain air-tight, and if you have unions or check valves in front of the pump, they could also be suspected as leaking air. To verify air leaks on the suction manifold piping assembly, you can pressurize the system from the skimmer, using a Drain King at the skimmer, and a plug in front of the pump. Whatever leaks water under pressure, is what is leaking air under vacuum. 
  7. Threaded fittings on the suction manifold. 
    Solution: The suction manifold is the pipes colored blue in the picture on right. Everything in front of the pump, or the skimmer and main drain pipes, fittings and valves. On some systems there may be more threaded adapters used, not just the one that goes into the pump. Some systems can have suction valves with threaded attachments, or other male/female threaded connections used, on the suction manifold, or the suction side of the pump. Threaded fittings in front of the pump all have the potential to leak, and should be eyed suspiciously when looking for an air leak on a pool system. You can use the Drain King method above to pressure test the entire suction manifold, or you can cover threaded joints in shaving cream (really!) and look for areas where the cream is being sucked into a void.
  8. Loose drain plugs on pool pump.
    Solution:
     Loose drain plugs can, on a few pumps, cause lots of air problems. If your pump plug uses an o-ring, and many do nowadays, make sure that it's still intact - they only seem to last 3-5 years, before dry-rotting. If your pump drain plug does not use an o-ring, make sure to use Teflon tape on the threads, and tighten with pliers to make sure the tapered plug is fully inserted. For best results, remove previous layers of Teflon tape, and wrap it 3x (in a clockwise direction as the threads face you), with new Teflon tape each spring, or whenever the pump drain plugs are removed. 

  9. Full skimmer and/or pump baskets, or clogged impeller. 
    Solution:
     Similar to #3 above, when the baskets are clogged, or the impeller is full of small bits, it causes the pump to work harder to satisfy it's 'thirst' for water. This creates greater vacuum pressure and starts to leak air from places that don't normally leak air - when baskets are clean. Check the basket and impeller for any clogging material.
  10. Filter was just cleaned and tank is still purging air. 
    Solution:
     When the filter tank is opened and the filters are cleaned, or if the pump basket is opened and water runs out of the filter, it can take a few minutes or possibly up to an hour before all of the filter air is pushed through the filter and sent to the pool returns. To avoid this, always open the air bleeder on top of the filter tank when restarting the pump (after cleaning DE grids or cartridges, or emptying pump basket). Let the air bleed out until a steady stream of water is spraying. It's normal for a few 'handfuls' of air to remain in the filter tank, and don't be surprised if there seems to always be just a little more air in the tank. But if after bleeding the air out of the tank, it builds up again and begins to bubble into the pool, at the wall or floor returns, check through reasons 1-9 above for the solution. 
Notice that None of my 10 Reasons for Air in the Pool Pump (or Pool Returns) included anything about underground pipe damage. So don't worry that your pipes underground may be sucking in air; although that can happen, it's a rare occurrence
Happy Air Leak Hunting!

Monday, December 28, 2015

Winter Pool Cover


Pool Cover befall all sorts of maladies, some common, some odd. Here’s 7 enemies of your pool cover, and how you can thwart them.
Trees: Number 1 enemy of the state – are those beautiful trees surrounding the pool. As the leaves drop, you can more easily spot broken or dead branches. This is the time to do some fall pruning of trees near the pool.
Even tree branches that are a good distance from the pool can be picked up by a strong wind, and thrown down to your pool cover. If the angle is right, or the branch heavy enough, pool cover damage is the result. Trees are the number one cause of pool cover failure.
Vehicles: Not just cars, but minibikes, ATV’s, bicycles, lawnmowers and farm equipment. If your pool is near a busy street, or if it could be possible for a car to crash through the fence and into the pool, consider installing some bollard poles or large landscape boulders to stop or deflect oncoming cars.
lawnmower-on-pool-coverIt’s more common than you may think, and it’s often not cars crashing through the fence, but runaway lawn equipment or teenage stunts gone wrong. In most cases, the pool cover will lose any battles with vehicle enemies and the drivers are often in danger.
Animals: Wild animals large enough to damage a pool cover include bears and deer, and depending where you live, wild pigs, alligators, elk and moose. Farm animals that are allowed to get too close to a covered pool are also in danger of falling on the cover. Even a safety cover can be severely damaged by heavy hooves. Large dogs may not damage a safety cover, but floating pool covers can easily be ripped from sharp claws, and are not safe for pets to be around.
cow-in-pool - this mesh safety cover is trashed!A sturdy pool fence, 5 or 6 feet tall is usually enough to keep out most four legged animals. Keeping a clean pool cover can also help. This time of year there can be so many leaves on top of a pool cover that it completely hides the pool cover. Spooked animals try to run across the cover, and don’t usually get far.
Wind: High winds can get up under solid covers, and pull them right off the pool, sometimes ripping them in the process. Some people like to leave a little water on the cover to help hold down solid pool covers.
pool-cover-in-high-wndsWall bags are small vinyl bags you can fill up with water and lay on top of an aboveground cover. Winter cover seal and cover clips are two more wind-stopping products for use with above ground pool covers.
Wind can also hurl items on your pool cover. Not only tree branches, but door and window screens, pool poles – just about anything not nailed down could become a pool cover killing projectile during winter storms.
Water: Too much water on top of a solid pool cover, and it will weaken the seams, and make small holes larger. It can also pull the cover towards the pool, and in some cases the cover can fall into the pool. Messy. Use a cover pump placed on an upside-down Frisbee, so that if there are any holes in the cover, you won’t end up pumping out pool water, through holes in the cover.
water-on-top-of-pool-coverIf water on top of a cover is important, the level of water under the cover is crucial. If a pool begins to leak water during winter, solid covers can fall in, and safety covers won’t have the support needed. Safety cover manufacturers warn to never let the water fall more than 18″ below the cover. Without the water to support it, safety cover springs and straps can bend and break.
The water level can also become too high for safety covers that allow rain and snow to melt through. At some point during winter or spring, if the water level begins to touch the underside of the cover, use a cover pump to lower the water level in the pool.
image purchased - presentermediaFire: Not surprisingly, sparks and flames can melt holes in any type of pool cover. This enemy of your pool cover can attack from an outdoor fire pit or bonfire too close to the pool’s edge.
Planning fireworks on New Year’s Eve? I have seen safety covers destroyed from large firework displays. Nearby forest fires? It may be best to remove the cover until the danger is past.
Ice: In most cases, the ice that forms on a pool cover during winter won’t damage the pool cover. This enemy needs a little help – from the pool owner. Never try to shovel, scrape or God forbid, melt the ice from your pool cover.
ice-swimming-pool-coverSafety covers especially, look as if they are going to break, when they are stuck in the ice of the pool and weighed down heavily with snow and ice. But don’t worry, it will melt eventually, and your safety cover will spring back up to it’s former trampoline appearance.
Keep solid pool covers pumped off as dry as possible during deep winter, and you’ll risk less damage from sharp edges of a large ice sheet on top of the pool cover. For snow storms, your cover pump won’t pump snow, but after the thaw, pump it off quickly, before the next freeze.
Enemies of your pool cover – they can be managed and mitigated. Take care with these 7 enemies and you and your pool cover can weather many winters together.

Wednesday, December 23, 2015

Fall has landed in your pool

leaves-in-pool
Autumn breezes and warm fall days. Beautiful to look at, but if your pool is surrounded by lots of deciduous trees – it can also make a lot of work to keep the pool clean.
I consider myself an expert in pool leaf removal, having personally removed over a million floating and sunken leaves, by my own estimation.
Here’s how to reduce the work, and get the leaves out of your pool with less effort.

Optimize the Skimmer Flow

Adjust the skimmers so that they are pulling at their strongest. You may want to close or nearly close the main drain valve to increase skimmer suction.
weir-2Check to make sure that skimmer weirs? are in place. These help to speed the flow of water into the skimmer, and help to lock leaves inside the skimmer when the pump shuts off.
Skim it attaches easily to most in-ground and aboveground pool skimmers, an arm that reaches out and grabs leaves passing by, directing them into the skimmer. One of our best sellers, it can increase your skimmer performance, and the spring loaded design installs or removes in seconds without any tools.

Optimize the Return Flow

A circular flow of water around the pool helps to gently guide floating leaves in front of the skimmer, helping to trap them before they sink.
water-flowUse eyeball fittings, or 90 degree wall fittings on the returns, to direct the water flow from all returns, in the same direction of flow.
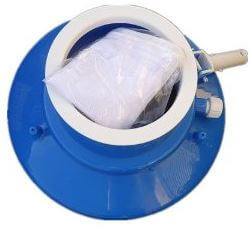
Aim the wall fittings slightly towards the surface, to get a small amount of surface action or ripple in the water.

Extreme Leaf Removal Tools

leaf-gulper

Leaf Gulper: When the leaves are so deep that they are clogging up the vacuum head or you need to empty the basket every 5 minutes, the Leaf Gulper is the answer.
Modeled after the Jandy Leaf Master, it works with the pressure from your garden hose, the better the hose pressure, the better and faster it will vacuum.
leaf-rakes-for-poolsLeaf Rakes: Still using the dip ‘n flip type of pool skim net? For heavy pool leaf problems, there is no tool better suited than a good Leaf Rake. For surface work, you can drag it behind you at the tile line, or use a push and pull method across the pool surface, from side to side.
Leaf Rakes are also great for scooping leaves off of the floor. When you get really good at it, you can move faster than with a Leaf Gulper. Push the net slowly across the floor bouncing just slightly to create a small current. Do a quick flip turn and hard pull back when you reach the end of your pole, or the other side of the pool.
Skimming leaves can put a strain on lower back swivelskim-elitemuscles when the pole is fully extended. Introducing the Swivel Skim Elite, the floating and swiveling leaf rake that removes the force of gravity, and does a quick swivel flip with a flick of the wrist.
Leaf Catchers: Catching the leaves before they fall into the pool – now that’s genius! Leaf catchers are commonly used to go over top of a solid pool cover, and then removed (with all of the leaves) once                                        the leaves have fallen.
leaf-catcher-closeupLeaf Catchers also be used without a cover, as a leaf guard during autumn. Use the grommets in the corners to pull the Leaf Catcher tight over the pool, so that leaves stay dry, and can blow off the cover.
Leaf Canisters: If you are vacuuming a lot of leaves in through the skimmer, you know how quickly the pump basket can fill up. You can use a Skimmer Vac Adapter, and vacuum into the skimmer basket instead, which is much larger.
leaf-canisterFor those really big jobs however, the skimmer basket is even too small. With the Hayward Leaf Canister connected to your vacuum hose, you can vacuum for longer without stopping. The design allows for consistent suction, even when the canister is full of leaves.
Leaf Baskets: Not just any skimmer basket, but a SkimPro skimmer basket with a tower design that allows water flow to continue even when the basket is jammed full.swim-pro-basket
If you ever had a skimmer basket break due to getting clogged with leaves, you’ll appreciate the smart design. The tower also functions as a handy handle to lift the basket out easily, even with strong suction skimmers.

Extreme Leaf Removal Tips

  • Start by skimming around the edge 2-3 times, then move inward.
  • Use a Leaf Gulper or Leaf Rakes to dredge leaves from the floor.
  • Clean off the pool deck with a blower before starting.
  • Place a few tall trash cans on deck to dump leaves.

Pool Stains from Leaves

After correcting a leaf overload problem, plastered pools may be stained from the tannins in the leaves. Balancing the water and shocking the pool will usually remove leaf stains. Extreme leaf stains in a plastered pool may require acid washing to see any real removal success.

Monday, December 14, 2015

Pool Plaster

THE NEW GENERATION OF POOL PLASTER

If your concrete pool is in need of a remodel, a great way to give it a new and fresh look is with a new pool finish, specifically plaster. With so many features and options available, it’s good to know the type that will best fit the needs of your family, while complementing your home and backyard design.
Pool plaster is one of the oldest and most popular ways to resurface a swimming pool. Generally, a pool plaster can last several years under ideal conditions. The good news is that there are so many options for plaster today that weren’t available in the swimming pools of old! Classic white pool plaster is a mixture of white cement, white marble aggregate and water. When filled with water, the surface creates a pool that is brilliant, clean and has a light blue water color. White plaster is the most economical choice for gunite or shotcrete pool surfacing. The downside to standard white plaster is the surface is more susceptible to pool deterioration from pool water chemistry.
For a different look to a pool plaster, homeowners are choosing to add colored ceramic coated sand to the plaster mix. From reds to vivid blues, the colored quartz adds both aesthetic and increased life expectancy to the plaster surface. A great option to consider when re-plastering during a pool remodel is QuartzScapes: a premium blend of crushed quartz, white cement and color tints. When you choose QuartzScapes pool finish, your pool will be completely unique: the patterns of texture and color, the specific hue of your chosen color, and the way the color becomes richer over time. All this, in addition to striking beauty and long-lasting durability, are what discriminating pool and hot tub owners consider being some of the real joys of owning a pool.
Another way to make your pool plaster unique is with aggregates. Aggregates offer the look of a myriad of pebbles worked into a concrete surface. Over the past decade, pebble surfaces have increased dramatically in popularity and come in a broad range of colors and color combinations. The appearance of the aggregate varies greatly based on the color of the concrete and the types of pebbles used. One of the most popular reasons for this type of pool finish is the slight texture that makes for a slip-proof surface. It is also a relatively low maintenance pool finish, although a sealant may need to be reapplied periodically to help it retain its appearance. StoneScapes give your pool or hot tub the naturally beautiful look of a pebble-bottomed stream. StoneScapes combines artistry with durability, comfort and safety to create a perfect finish for a remodeled pool, BBQ Islands, or other outdoor amenities.
Pool plaster additives are not only for aesthetic purposes – some can alter the physical and chemical composition of the plaster, increasing strength and durability without sacrificing beauty or texture. These additives known as “pozzolans” take the weakest element in plaster and make it less susceptible to chemical attacks. Pozzolan based products have been known to reduce etching, mottling and cracking.
Whether you choose the basic white plaster or decide to make a stunning change with a pebble finish, knowing your options when re-plastering your pool can have a significant impact on how well your pool and hot tub maintains its appearance over time. 


Friday, December 11, 2015

Most Dangerous Bodies of Water on The Planet


Swimming is a very relaxing and fun experience, not all pools or bodies of water are created equal—and some of them are not meant to be swimming or tourist spots.
We prepared you a list of the top 10 of the craziest, and therefore most dangerous pools in the whole world.

Wednesday, December 9, 2015

How to Open Your Pool After The Winter

What Will You Need?

  • Cal-Hypo/Power Powder is recommended
  • Pool Brush
  • Pool Skimmer
  • Test Kit
  • pH Increaser or pH Reducer/Soda Ash or Dry Acid
  • Alkalinity Increaser or Decreaser
  • Calcium Hardness
  • Pool and Spa Lube

Tuesday, December 8, 2015

Winter Cover vs Safety Cover : Review and Comparison

Depending on where you live, pool season may be coming to an end (we’re sorry!!). If you are preparing to close your pool for the year, you have likely considered a cover. But what type of cover do you buy? Today we will take a look at winter cover vs safety cover to determine which option is best suited for your needs.

Winter Covers


Winter Covers provide you with a great way to keep your pool healthy, clean, and running smoothly through the fall and winter seasons. Winter covers work with both above ground or in ground swimming pools. Using a winter cover protects your pool from dirt and debris, blocks sunlight to fend off algae growth, and help keep children and pets out of the pool.


Winter Cover Pros:

  • Very affordable
  • Can be uses on both in-ground and above ground pools
  • No need to drill anchor points around your pool (like with safety cover)
  • Reduces evaporation
  • Prevents pet access
  • Lowers chemical use
  • Keeps pool free from debris
  • Easy opening in the spring

Winter Cover Cons:

  • Does not last as long as safety cover
  • Does not provide the same level as safety for children

Safety Covers


Keep your swimming pool protected from accidental entry while keeping it clear of dirt and debris this winter season with a Safety Cover. 

Safety Cover Pros:

  • Very durable and long-lasting
  • Keeps pool debris-free
  • Reduces evaporation
  • Safeguard pets and children
  • Inhibits algae growth
  • Keeps pool free from debris
  • Easy opening in the spring

Safety Cover Cons:

  • Does not work for above-ground pools
  • Installation is more complicated than winter cover
If you really aren’t ready to call is quits on pool season, we don’t blame you! Another option is investing in a pool heater or heat pump to extend your season. Give us a call so we can help! The Blue Lagoons

Monday, December 7, 2015

How to Detect Swimming Pool Leaks


Swimming pools lose water every day to evaporation, especially in the high heat of summer, but generally this natural water loss is minimal. That’s why most pool owners know when their pool is leaking. For instance, you might notice that you’re losing an inch or two of water in a matter of days, or that your monthly water bill is trickling up. Either way, something isn’t right.
But how can you confirm your in-ground pool is leaking? And how do you find the source? Is it a crack in the vinyl pool lining? Or is water sweeping out around a light or loose fitting? Luckily, there are a few quick ways to confirm that your pool is leaking and find the source of the leak.
1. Overnight Water Level Tests
Want to tell the difference between evaporation and a leak? A quick overnight test can help. In the first test, you can mark your pool’s water level with a grease pen or piece of tape. If there’s a leak, the water will drop an inch or more in a day or two – that’s not evaporation. Or you can try the “bucket test.” Set a small bucket on a step in your pool. Fill the bucket so that the water inside matches the water level of the pool. Again, wait a day or two and compare the water levels. More than an inch of water loss in 24 to 48 hours likely means a leak.
2. Visually Confirm You Have a Leak
Simple leaks around equipment can be easy to detect, which is why a quick visual check can help you quickly diagnose a problem. First, examine the area around the pool and look for saturated ground. If the landscaping around your pool is waterlogged, you may have a leak in the plumbing. Plus, be sure to inspect your pool’s hardware, including the filter, heater, and the pump. These units are built to withstand the constant workload, but they’re also prone to leaks. Check for water damage, stains, standing water, drips, and sweeping. Leaks in these systems may be fixed with simple patches or chalking, or they may require a replacement part.
3. Check Your Pool Lining for Tears
With proper maintenance and installation, a vinyl pool liner can last 10 or more years. But they are prone to separation and rips, and that can spell trouble for water bills. A small tear in your pool’s vinyl lining can result in an inch or more of water loss in 24 hours. To begin, visually inspect the lining, looking for cracking, tears or rips, and start with areas most prone to problems, like seals around returns, lights, and in the corners. Pool lining patches are available, which provide a low-cost repair, but in some cases, the lining may need to be replaced.
4. Checking Skimmer and Return Lines for Leaks
Each pool has a suction system or skimmer, which delivers water to the pump. The pump sends the water to the filter, and then that filtered water returns to the pool. These system lines are common sources of leaking. You can check by plugging one line at a time and monitoring water levels. For instance, there are low-cost rubber plugs that can be inserted into any return line outlets. After plugging all of the outlets, wait 24-48 hours. If the water level drops, you likely have a leak in your return line. If not, move on to the skimmer lines. Then, plug all skimmer intakes with the rubber plugs. If there’s a leak, there will be significant overnight water loss. If you’d like to check all of the lines at once, try turning the system off for 24 hours, but do not use the pool in this time. If the water levels still drop an inch or 2, there’s a leak elsewhere. If you turn the system back on and the drops continue, then you can start looking for leaks in the lines.
5. Using Dyes to Detect Leaks
Another common method for detecting leaks is using a cheap dye pack. The dye is drawn to the source of the leak, and can quickly help you locate the source. In these instances, turn off the pool’s skimmer, and place dyes around problematic areas like fittings, lights and corners. As you work your way around the pool, you’ll likely be able to isolate the source. Don’t worry too much if the dye doesn’t work the way you expect. In most cases, it just falls down to the bottom, indicating no significant leaks in that section of the pool.
6. When To Call A Professional
If you’ve exhausted your options or discovered a leak, it’s probably time to call a professional pool crew. Professionals have specialized equipment, which can detect slight leaks without any destruction. If you’re struggling to find the source of a leak, a professional can help. Plus, they’ll be able to perform any repairs. Although some basic repairs are DIY jobs, like minor lining patchwork or adding putty around a loose fitting, more complex jobs like skimmer and return line repairs and vinyl lining replacement, require professional expertise.
Feel free to contact The Blue Lagoons if you have any questions! 

Friday, December 4, 2015

Tips and Tricks on Cleaning Your Swimming Pool Filter Cartridge

The time has finally come, your pressure gauge is 8-12 PSI above the designated starting pressure of your pool filter. This can only mean one thing, it’s time to clean your filter element. Customers often ask us how we can help in simplifying the daunting task of cleaning their filter. We know that pool maintenance isn’t the most exciting part of owning a swimming pool, but hopefully these tips and tricks will be helpful and convenient for your cleaning methods.
Since the process of removing a filter element varies by manufacturer, it’s best to follow the instructions specific to your pool filter. If you’re unfamiliar with this process and no longer have your instruction manual, please contact us. Be sure to take notes of all parts and hardware during the disassembly process for a quick and easy reassembly.
Once your filter elements are removed, it’s time to rinse! Use a garden hose to rinse debris from between the pleats while motioning from the top of your filter to the bottom. Try to remove as much debris as possible. Flip the filter 180 degrees and, again, hose from the top down. If you’re having a difficult time removing debris of you want to ease the process a bit you can try the Filter Flosser.
For the next step you’ll need a bucket or a large trash can that’s big enough to hold your elements. This step will help you remove sunscreen/suntan lotions, perspiration and oils. In order to do this you’ll need to soak the elements in a Filter Cleaner. Trisodium Phosphate (one cup per five gallons of water), or dishwasher detergent (one cup per five gallons of water). Be sure to soak the filter cartridge for 1-10 hours. Remember: the longer the better.


Once your filter cartridge is done soaking, you’ll want to shake and dip the element while it’s still submerged to help loosen debris. If you still notice debris in between the pleats, you can repeat the rinsing steps. Be sure to remove all cleaning solutions and oils before proceeding.
If you see some stubborn algae still stuck on the filter cartridge, Cal-Hypo or other minerals, soak the cartridge in one part Muriatic Acid and twenty parts water (always add the acid to the water, never the water to the acid. Mixing water and acid forms hydronium ions. When these ions are highly concentrated it causes the acid to split and splash. Soak the cartridge until all the bubbling has stopped.
Finally, give the filter cartridge one final rinse to spray off the acid/water solution. When reassembling your cartridge pool filter, it doesn't hurt to apply a dollop of silicon based lubricant to the o-ring to help extend the lifespan.
That wasn't too bad, was it? Whether you've cleaned your filter before or this is your first time, I hope you found these methods helpful. If you'd like us to assist you with your filter clean, please give us a ring for an appointment. 

Thursday, December 3, 2015

Should I Remove my Salt Cell For the Winter?


When preparing your salt water swimming pool for the cold winter months there is a standard chain of events that needs to take place.This will ensure that your pool will ride out the season without any wear and tear from the elements, an unwanted surprise for any home owner. Homeowners who use a Salt Water Chlorine Generator in their swimming pool have additional worries!
Pool owners constantly ask us questions about winterizing or closing their pools. Recently, questions about salt cells have been trending. Salt Chlorination has been gaining in popularity for decades as a clean, reliable, eco-friendly, and efficient way to keep swimming pools sanitized. Many pool owners have been asking us “What in the world do I do with my salt cell during the winter? Your Salt Cell is a pretty smart piece of equipment. When the temperature gets below 60 degrees Fahrenheit or so your cell will most likely shut itself off automatically. This will lengthen the life of the cell and protect your investment.

How it works:

During the winter months the amount of chlorine needed to keep a pool clean is substantially reduced due to the fact that bacteria doesn’t grow in cold temperatures (around 50 degrees Fahrenheit or so). The salt cell is programmed so that it recognizes the temperature drop and makes the decision to shut itself off. This is great news for the customer (you) because it increases the lifespan of the cell, uses less chlorine or harsh chemicals in the swimming pool, and saves you money.

Should I remove it?

Some of you might be thinking that the salt cell is okay to stay in your swimming pool. While this can be true depending on your location, during the colder months you risk the potential of water damage due to freezing throughout your salt cell and equipment. Manufacturers will most likely advise you to remove, clean, and store the unit indoors to avoid any damage. In fact, some manufacturers offer a dummy cell which fits in place of your existing salt cell. A dummy cell is a mock salt cell, basically a non-functioning piece that takes the spot of your existing salt cell for the winter.
Pool owners living in climates that don’t experience harsh or particularly cold winters may risk leaving the cell out for the winter, but others will have peace of mind taking their unit in for the winter. The benefit here is that during the winter you can increase the lifespan of your salt cell while saving money on traditional chlorine methods. Increasing the lifespan of your salt cell while saving money on pool chemicals is definitely a benefit for your wallet!

What do I do if my salt cell is already damaged?

If you have left your salt cell in for the winter and are noticing low chlorine levels within your pool, check your salt cell for any damage. Unfortunately, during the harsh winter months water can freeze and expand, ultimately damaging the housing that surrounds the cell or moves the electrode plates. Although electrode plates can be replaced it can be almost as pricey as buying a new salt cell for your system. The best way to fix this is prevent it from happening.
If you have any questions or would like to start weekly/biweekly service with 
The Blue Lagoons, give us a call!

Wednesday, December 2, 2015

Leaves Falling in Your Pool From Your Trees?

How to Deal With the Leaves

During pool season, these trees provide so much for the pool owner in the way of beautifying the pool environment, providing a cool spot near the pool, and providing shade for those that need sun protection.
On the other hand, during the fall, pool owners are paying the price of having trees. What can a pool owner do to combat the leaf problem? You could cut your trees. When the leaves fall in your pool, they absorb the chemicals in your pool and turns your pool green. By cutting your trees it would make it easier to keep clean during the fall. As well as easier on your pool guy, and could save you money on one-time cleans. 
But if you want to keep the trees, here are some things you could do to help prevent the leaves from falling in the pool: 
Mesh covers
Mesh covers have become increasingly popular in recent years. Mesh covers allow water to pass through but catch the leaves. Although the leaves will still have to be removed from the top of the mesh cover, the cover keeps the majority of the leaves from getting into the pool. A properly installed mesh cover (which resembles a trampoline-look over your pool) allows you to blow the leaves off the cover.
Leaf nets
Leaf nets are a much less expensive alternative to mesh covers, but work on the same principle. Leaf nets look similar to fishing nets. They lay across the pool, anchored by water tubes, and catch the leaves as they fall. Periodically the cover must be removed in order to remove the leaves from the top of the cover.
Safety fences
Although the primary purposes of a removable safety fence are to keep children away from the pool and keep pets or stray animals (such as mice, rats, frogs, snakes, crawfish, turtles, armadillos, beavers, and even an occasional skunk) they are also effective at keeping blowing leaves from entering the pool.
Daily maintenance
If you are disciplined enough to do it every day, daily maintenance is a great method of removing leaves from your swimming pool. This requires you to empty the skimmer baskets, dip the leaves out of the pool, and remove leaves from the automatic cleaner on a daily basis. Some pool owners find that 2-3 times per day is required when the leaves are really falling. One consideration here is to be aware of the possibility of snakes in the skimmer baskets. Often times it is difficult to see snakes as they often curl up in the basket and are not clearly visible. Therefore, it is important to be careful when cleaning your skimmer baskets. Be sure that your skimmer basket has a handle so that you do not have to reach into the basket. In addition, before reaching into the skimmer basket, look very closely, and even consider using a hook or pliers to remove the basket. 
We hope this helped you!
Visit The Blue Lagoons if you are in need of weekly or biweekly pool service in the Dallas Metroplex Area. 

Tuesday, December 1, 2015

How Long Should I Run My Pool Pump?

This is a question we get asked by everyone, whether they've had a pool for years or just started taking care of one.
The best answer would be to run your pool’s filter system 24 hours a day. However, that could end up costing quite a bit of money, and more than you really need to spend.