Tuesday, April 26, 2016

Leaky Pool Filter Multi-port Valves

Multiport Valve Leaking

Sand and DE filters often use a Multi port valve to reverse the flow into the filter for backwashing. Multi ports also offer Waste and Recirculate functions, which can be useful at times. But it also makes the multiport valve a fairly complicated piece of pool equipment.
When a pool filter is leaking, half the time it's actually the multiport valve that leaks. The usual multiport problem is leaking water, or water coming out from somewhere it shouldn't.
So then, today's post is about leaky multiport valve problems and solutions. 6 specific types of multiport valve leaks.
The first thing you need to know is that these small valve leaks aren't going to explode and drain the pool, well probably not. 


Q: MULTIPORT VALVE IS LEAKING WATER AROUND THE HANDLE

Stem o-rings on the rotor or diverterA: There is always some rain water that collects around the handle, but if water starts to ooze up and overflow onto the lid, you have a common multiport valve leak. Underneath the handle is a large Teflon plastic washer, but this is not the cause of the leak. The handle connects to the stem (with the pin), and on the stem are two small o-rings that seal up to the underside of the cover. These two o-rings, about the size of a quarter, fit onto the stem (which is connected to the rotor, aka footpad or diffuser or divert), or they fit under the cover. Over time, they may wear out or dry out or blow out, or lose their lubrication. Cold water temperatures will make it worse, as the o-ring can shrink just slightly, or small bits of grit and debris can get wedged up around the stem o-rings, causing leaks. 
MPV key assemblyFor this situation, I would first just reposition the valve. Shut off the pump and push down on the multiport valve handle fully, once or twice. Move it slightly left and right and then back to the Filter position. Use a sponge or leaf blower to remove the water sitting under the handle, and turn the pump back on and see if it still leaks. Often, just reseting the stem o-rings will seal up a leaky multi port lid cover. If that didn't work, then you may have to consider a valve rebuild. The easy route is to buy the 'Key Assembly' which is everything but the valve body, or from the handle to the rotor. The much cheaper way is to remove the key assembly from the valve, and knock out the pin to remove the handle. Then you can pull off the cover, and replace the stem o-rings. Be sure that during reassembly, you orient the cover and rotor to each other in the same direction as before.  

Q: MULTI PORT VALVE IS LEAKING WATER AROUND THE COVER

A: When the leak is around the outside of the top, where the lid mates with the valve body. The first thing to check is that the system is not under unusually high pressure, from a dirty filter, closed return valves or plugged wall returns. If normal, check that the cover screws are all tight.If it's still leaking, remove all cover screws and pull out the key assembly. Clean, inspect and lubricate the large cover o-ring and place back into the groove in the key assembly. Replace the key into the valve and tighten up the cover screws, then fire-up the pump to check for leaks. Valve cover o-rings don't usually go bad over time, but if it's broken, dry-rotted or damaged, you can replace just the cover o-ring.

Q: MULTI PORT VALVE IS LEAKING WATER AROUND THE GAUGE

wrap the pressure gauge threads in a clockwise directionA: Another common leak is a small trickle of water running down below the pressure gauge on top mount sand filters. You want to make sure the gauge is firmly held in place, if the gauge were to shoot out under pressure, you could lose a lot of water before discovering the leak. One cause of this is too much Teflon tape on the pressure gauge - years of it! If you're guilty of this, peel off the previous years' layers and lay on 1-2 new layers of Teflon tape (always wrapping the threads in a clockwise direction).
Another cause of a pressure gauge leak on a multiport is that the plastic threads in the valve body are stripped. The valve threads can't be tapped or retreaded, because then the gauge threads will be too small. If you definitely determine that the threads are stripped inside of the valve, you can thread in a Helli-Coil or other 1/4 in-20 thread repair insert, which involves tapping out the hole slightly larger, and screwing in a double threaded 'helix' type of bushing, which gives you new 1/4 in threads for the gauge.
A third cause of the pressure gauge leaking problem is when the valve body is cracked just below where the gauge screws in. This is usually caused by too many layers of Teflon tape on the gauge, and over tightening or cross tightening the gauge. This splits the plastic valve body and causes a leak, but there is a simple repair. Shut off the pump and tighten the gauge more to open up the crack slightly. Clean it out with a toothbrush or small wire brush, and be sure it's dry. Squeeze Super-Glue into the crack, from top to bottom, and quickly un- thread the gauge, so the crack will close up. After an hour or so, replace the pressure gauge carefully, after having removed the years of Teflon tape buildup, replacing with 1-2 layers of new Teflon tape or other thread sealant. Be careful not to over tighten the gauge, just 3 or 4 turns, or until it feels snug.

Q: MULTI-PORT VALVE IS LEAKING WATER WHERE THE PIPES CONNECT

top mount multiport A: Multi port valves have 3 ports, Pump, Return and Waste, where pipes are connected, using 1.5 in or 2 in threaded pipe or adapters. At the point where the Pump and Return pipes are threaded into the valve is a common spot for a leak. One cause of this is when a hot pool heater backs up hot water to the valve, which shrinks the PVC connector. In this case, a PVC replacement is in order. Another cause of leaking multiport pipes comes from sagging pipes from movement of the equipment or equipment pad, not very common but it can happen. The most common cause is over-tightening the adapter into the valve, which can cause a crack to appear later during a 'high-pressure event'. Events such as closing a return valve while the pump is running, or starting up the system with plugs in the wall returns, builds up a lot of pressure and could even blow the pipes right out of the valve. 
If the valve body is cracked just below where the pipe screws into the valve, you can replace the valve body, or you can try to repair the crack with Super Glue, as described two paragraphs above. Or, replacing the entire multiport valve may be in order, if the key assembly parts are old and worn.
If the drip is very slow or oozing, you can safely ignore it for awhile. If it begins to saturate the ground under the equipment you may want to take action. You can replace the PVC fittings and some pipe, which you can find at any home or hardware store, along with PVC primer and glue. On the new fitting, smear RTV silicone sealer on the threads and then wrap it 3X with Teflon tape. Hand tighten, then turn with large pliers for another full revolution, being careful not to over tighten. Reconnect the pipes with a coupling or union.

Q: MULTIPORT VALVE IS LEAKING WATER OUT OF THE WASTE LINE

A: Water is supposed to stop coming out of the waste line after you stop backwashing the filter, but eventually you will notice that water is leaking out the backwash line all the time, not good. First thing I would do is to shut the pump off and push down on the handle fully, turn the valve slightly left and right, and then back to Filter position. Sometimes small bits of debris get stuck between the rotor and spider gasket, and this flushes out the valve. Turn on the pump again to check if that helped. If it still leaks after repositioning the rotor onto the spider gasket, shut off the pump again and remove all of the cover screws, and pull out the key assembly.
inside of a multiport valve, we see the spider gasket in the bottom, looking like a wagon wheelInspect the spider gasket (wagon wheel shape) for wear or damage (note that some Pentair valves have the spider gasket on the bottom of the rotor). If you find that the spider gasket looks good but is just loose, break out the Super Glue or silicone, and use dabs to glue any loose rubber down into the (dry) grooves of the valve body. If the spider gasket looks too far gone, badly twisted and torn, you should replace it. Be sure to use the correct gasket (or use a Valve Go-Kit) for your valve, as they are all different sizes. Scrape out the old gasket with a sharp, small flathead screwdriver, removing all tiny bits of rubber, and glue the new gasket in place (flat side down), using dabs of Super Glue or silicone in the (dry) grooves. Tighten the key assembly in place over the new gasket (no lubrication needed), and you're done replacing a spider gasket.
Multiport valve springAnother cause of a backwash line leaking is that the spring inside of the key assembly has failed. When this happens, your valve handle is floppy and there's no tension when you push down. Chemical corrosion can break down the stainless steel spring over time. Remove the key assembly and look under the lid at the spring to check for rust that has broken the spring's coil. To repair, you can just buy the new key assembly, already assembled, or you can break down the valve and replace the spring. To do this remove the key assembly from the valve, and knock out the pin to remove the handle. Then you can pull off the cover, replace the spring, and while you're in there, replace the stem o-rings too. Be sure that during reassembly, you orient the cover and rotor in the same direction as before.
One more thing - please don't repair a leaky backwash line by gluing a valve on the backwash line! I've done myself before, in a pinch - but it should be avoided; these problems above can cause water to bypass the filter, resulting in poor filtration, and - one time in the future someone is going to forget to open the backwash line before backwashing, which can cause even bigger problems.

Q: MULTIPORT VALVE IS LEAKING WATER WHERE IT CONNECTS TO THE FILTER TANK

A: Slow seeping weeper running down the filter tank? Top mounted multi ports attach differently than side mount multiport valves, so let's take them each separately.
Top mounted valves used on sand filters, attach to a flange that is molded onto the top of the filter tank. First determine if the leak is coming from between the tank and the flange, or the valve and the flange. If the flange is leaking where it connects to the tank, I'm afraid I don't have much help for you. But if the leak is between the valve and the flange, the first thing to check is the tightness of the bolts or the clamp band (turn the pump off first). Repositioning the clamp band and re tightening can help in some cases. Unlike my many cautions above to not over tighten PVC fittings into the multi port valve body, when tightening clamp bands, there is no such thing as too tight. Tighten down clamp bands until they squeak and creak, often times this will fix a leak between the filter flange and filter valve.
PVC union 1.5in slip x slipIf you can't get the leak to stop, you can pull off the valve to inspect the flanges and flange o-ring. To do this you may need to cut the pipes with a hacksaw, and glue couplings to reconnect the pipes afterwards. If you have unions, or install unions instead of couplings, you can quickly disconnect the Pump and Return pipes (for valve repairs, sand changes, or other repairs). Replace the flange o-ring if it looks dry rotted or damaged. Use lots of pool lube on the o-ring and flanges to improve the seal and tighten it all up again. If it still leaks, or weeps, check to see if return side pressure can be reduced, by changing filter sand, and/or reducing resistance after the filter with less equipment, straighter runs or larger diameter pipe.

Bulkhead for PacFab filterSide mounted multi-ports, used on sand and DE pool filters, connect to the filter via two (2) Bulkhead Unions, and two sweep arms. DE multi-ports and Sand multi-ports are not interchangeable, because they operate in reverse. For sand filters, water enters on the top bulkhead, but for DE filters, water enters the tank through the bottom bulkhead.

side mount multiport valve on a sand filter For leaks on side mount multiport valves, determine if the leak is between the tank and the bulkhead or the bulkhead and the filter. To disconnect a side mount valve from the filter, open the air bleeder and drain most of the water from the filter tank, then loosen the bulkhead union nuts. Pull back on the valve and/or push on the tank to pull them apart, and be prepared to support the valve after pulling it off (cinder block or bucket), to avoid a lot of weight on connected pipes. Inspect and lubricate the o-rings on the valve sweep elbows. Filter tank Bulkheads can be tightened up by turning the large nut inside of the tank, using very large pliers or a strap wrench. Bulkheads also have gaskets and spacers on both sides of the tank wall, that may need service or replacement at some point - which may be after you've tightened the bulkhead, but it still continues to ooze water. Bulkhead parts are considered Filter parts, not Valve parts. 

Tuesday, April 12, 2016

Guide to Swimming Pool Safety


Guide to Swimming Pool Safety

Having a pool in your yard is like a gateway to summer fun, especially when you have kids and they’re able to invite their friends over, and get some great exercise. A lot of people know the basics of pool safety because it’s just common sense, but if you haven’t taken much time to think about it beyond that – you could be leaving your family and friends vulnerable to some dangerous disasters and worse case scenarios like drowning that do happen from time to time, mostly due to negligence, which is preventable. Not only that, but pool safety is also very important during the winter months as well, as about 20% of drownings happen during winter. Let’s take a look at some essential tips you've got to consider in order to keep your kids safe at the pool.

Fence Your Pool

There are numerous reasons that you should have your pool area fenced in. Some pool-owners are reluctant to install a fence because of the aesthetics, but there are types of less intrusive fences you can use to surround your pool, for example a a glass pool fence. Not only that, but safety should be the number one priority above looks. That's why fences are mandatory for pool owners at least in Australia. Also, it's not just about protecting people, either. A fence will also help prevent animals from falling into your pool and drowning. A helpless animal is never a pleasant thing to find floating in your pool.

Winter-Proof Your Pool

Summer isn't the only time to think about pool safety. 1 out of every 5 times that somebody drowns, it happens in the wintertime. Pools are often covered in the winter, making them very difficult to escape if you fall in. A fence is the first step to take, but it doesn't do any good once somebody is on the inside of it. So, to really up the safety of your pool in the winter (or even if it's going to be unused for a while in other months), consider installing a pool net which goes over top of your pool similar to a cover, but it prevents anyone (or animals) from falling into the water. A net can go over top of your pool cover.

Alarm Your Pool

Pool alarms help you feel much safer with kids around the pool when it is unused. They work by loudly alarming you whenever a large enough mass disturbs the pool surface. This is something all parents need to use as an aid, but you still have to be aware that the best form of defence against accidents is to...

Supervise Your Kids

Keep Watch on your PoolAs a parent, you've got to be very diligent with supervising your kids when they're in the pool. That means at all times. If you've got to run inside for a few minutes, get them out of the pool if they're not old enough to be confident in their swimming abilities. Young children should never be left alone in the water; it only takes a split second for tragedy to strike. If you have kids in the house, talk to them about the basics of pool safety and how they can help prevent drowning by being an additional set of eyes and ears, and taking care to shut the gate, and never swimming alone. There's no substitute for setting boundaries and drilling the severity of pool safety into your kid's heads from a young age; you can't be too paranoid when it comes to staying safe in the water.

Use Proper Pool Signage

It’s a smart idea to find a place near your pool where you can put some simple safety signs. Anything from a reminder to not run near the pool, to a chart showing the basics of CPR, these can serve as life-saving reminders in the event of an emergency. There are often requirements for public pools to display signs, but that isn’t always the case for private pools; it’s still a good idea, nonetheless.

Study Up

This applies to you and your children alike. You've got to learn proper pool safety in order to teach it. You should also educate yourself on how to do CPR, or better yet take CPR classes, and have your children do the same. It only takes one afternoon of your time, and what you learn can save a life. You never know when these skills will come in handy, either. Chances are you’ll never need to use CPR at your own pool, but what if you did? Or what if you’re out at a restaurant and somebody is choking? Wouldn't it be a good feeling to be able to help them? If you have a pool in your yard, swimming lessons are important for everyone in the home to consider, even if it’s just to learn a strong foundation of the core skills.
 

Kids Alive - Do The Five

In Australia, a popular pool safety program,Kids Alive - Do the Five; created by Pool Werx and the popular Olympic swim coach Laurie Lawrence teaches some lessons for those who own swimming pools in their backyards, or when visiting homes with pools, or even community pools.
Do the Five - is a short list of some very important tasks for the pool owner.The five things are listed above. It's meant to be sung, as a song - with an upbeat rhythm. It's a great teaching tool for young children - and for parents.

Monday, April 11, 2016

On Reducing Pool Pump Energy Usage

On Reducing Pool Pump Energy Usage


Energy Star Pool PumpsPool Pumps can be energy wasters, especially when inefficient single speed pump motors are used. 
Or when the pool pump runs for too long each day, or when the water is not balanced and sanitized properly.
Today's blog post is a recap of pool pump energy usage, and how you can save pump electricity, energy and money, while making your pool more ecofriendly at the same time.
Sure you can install an energy efficient pool pump, but there are other ways to reducing pool pump energy use.

Ten ways to reduce the amount of energy consumed by your pool pump.  

  1. REDUCE RESTRICTIONS:  Your pool pump has to overcome vacuum and pressure restrictions, and attempts to balance or straddle these two forces, at a point between the pump curve and system curve. Or said more plainly, the resistance that the pump must overcome is in proportion to the amount of Work the motor has to do. 2 inch plumbing is used on larger pumps, because the larger diameter has less resistance than 1.5 inch pipe. Larger pool filters are also less restrictive than smaller filters and run with lower filter pressure. Check valves, directional valves, chlorinators or purifiers all add restriction, as does a pool heater. Finally, the fewer bends in the pipes, to and from the pool, the better. Every bend or turn in the pipe adds resistance to the system. Total Resistance, as seen in a pump curve shown to the right, is a measure of all of the pipe, fittings, and other equipment (filter, heater, chlorinator, valves) resistance. Most pools are in the 20-40 ft of head, but some systems can run higher. Put even more plainly, if the plumbing pipe size can be increased, or redesigned for fewer bends and twists, and if unnecessary equipment is removed, or if the filter size is increased - these will reduce the Work for your pump motor, which will then need fewer amps, to get the work done.
  2. Chart showing temperature vs pump run time in hours. The warmer the pool water becomes, the more filtering is neededRUN THE PUMP ONLY AS NEEDED: You have to be careful here, because if you are too skimpy with the energy usage, you'll end up paying much more in chemicals and filtering to bring the water back to good condition. But, you can experiment with how much time is needed for your pool to stay clean and clear, at any given time during the season. You will need more filtering when it's hot, perhaps double the amount during the hottest summer months, than you need during the cooler shoulder months. The actual amount needed for any pool depends on the efficiency and effectiveness of the pump and filter system. Pools with undersized systems will need to run the pump longer than pools with (larger) systems that have more effective filters and higher flow rates. Most pools are originally designed to turn-over all of the water in a pool within an 8-hour time period. For this reason, most pools should operate the pump at least 8 hours per day, up to 16 hours during periods of high use or high temperatures. Some sunbelt pools with good systems can get away with 4 hours daily during the off-season, but only when water temperatures are below 60 degrees. If you spend the time to experiment with your time clock over the course of a week, you can find the tipping point where the pool starts to look a little hazy, not quite as bright and clear (all else being equal). Then set your time clock for a few hours more than that cycle (you do have a time clock, don't you?). For most pools it's a good idea to over-filter the water just a bit, so I usually recommend 12-15 hours daily, during pool season, but some pools can get away with less.
  3. Hayward Superpump Variable Speed PumpUSE A VARIABLE SPEED PUMP: Variable speed pumps use lower speeds to consume less energy. When you reduce impeller speed (RPM) by half, you reduce the amperage required by 8 times! Basic models like the Superpump VS or Max-Flo VS have several speed options, which are Pre-set. Full-featured VS pumps like the IntelliFlo or Eco Star are able to sense the required pressures and achieve a balanced harmony with the perfect impeller speed to get the job done. Variable Speed pool pumps can reduce energy consumption by 50-80%, so payback on their higher purchase price comes within a few years. Energy Efficient VS pool pumps have another attractive quality in that their motors are quiet and cool permanent magnet motors, which last longer than traditional induction motors. 
  4. USE A TWO SPEED PUMP: Two Speed pumps (also called Dual Speed) are an improvement over single speed pumps, and can reduce energy use by 30% or more. Problem is, you also need a two speed time clock, and add an extra wire from the clock to the pump, as the fourth, low-speed wire. This increases the cost to such a point that you may as well just buy a VS pump, which will have at least 3 speeds, contains its own time clock, and uses the permanent magnet motor. 
  5. Huge Pool FilterUSE A BIGGER FILTER: And/Or a more effective filter. A pool filter that is more effective (like a DE filter) is so efficient at trapping dirt that less filter pump run time is possible. And a bigger filter is also going to have greater dirt trapping ability, but perhaps more importantly will have less resistance than a smaller filter. Running at lower pressure, the larger filter is less Work for the pump to push water through. 
  6. USE A SMALLER PUMP: A lot of people don't know this, but not all 1 hp pool pumps produce the same amount of flow and pressure. There are medium flow, high flow and very high flow pumps. A 3/4 hp Whisperflo pump produces about the same flow rate as a 1.5 hp Superpump. Or a 1 hp Challenger pump can produce the same flow as a 2 hp Super Flo pump. A smaller pump horsepower translates to lower energy costs, because they use fewer amps. Replacing a medium-flow high-hp pump with a high-flow low-hp pump is what I'm talking about.
  7. USE ENERGY EFFICIENT MOTORS: Most pumps that you buy on line, or installed by a builder are using 'Standard' motors. But if you were to swap out a dying motor with the Energy Efficient (EE) or High Efficiency (HE) equivalent pump motor, you could reduce amp draw by 25%. This is done by using improved design concepts and materials that result in lower electrical loss. 

  8. USE A SLIDE VALVE: If you have a choice in the matter, for sand and DE filters with side mount valves, the Slide valve, aka Push-Pull valve has less resistance than a multiport style valve, especially in the 2 inch size.Cartridge filters, on the other hand, have no filter valve at all, and also can be a way to reduce filter resistance and motor work. 
  9. Taylor DPD test kitsMAINTAIN BALANCED WATER: Giving the pool chemistry constant attention will prevent water problems from growing into something that requires running the pump longer to restore the water quality. Good water balance and sanitation practices reduces the need for additional filtration.
  10. USE HELPER SANITIZERS: When your water is really sanitary, there is less work for the filter to do - fewer particles to remove from the water. Adding a secondary, or supplemental sanitizer (as I like to call them) like Nature2 or Ozone, or even using Clarifier or Enzymes, can reduce your filtration demand, allowing you to run the pump less, while still keeping the water clean and clear.

Wednesday, April 6, 2016

HOW TO PLAN A COOL POOL PARTY

How to Plan a Cool Pool Party
avatar

It’s not always easy planning a pool party. If you’re a pool fanatic, chances are you've either hosted or been invited to numerous amounts of gatherings in the past. And when that’s the case, it’s hard to come up with a unique pool party idea. But have no worries! Here’s a simple guide to help you create a pool party for kids or adults that won’t soon be forgotten.
1. Don’t forget the invitations. Receiving an invitation in the mail is so much more exciting than just getting a regular old phone call or an email. Plus, it’s your chance to impress and set the mood for your pool party. If your guests all live nearby, invite them to your party via a message in the bottle. You can buy clear corked bottles on line or you can go the more cost efficient route by buying any soda pop that comes in a clear glass bottle. Just simply drink up the contents first (yum!) and remove the label. After washing, you can add some sand into the bottom and stick a rolled up invitation inside. This is a great way to get children involved.
2. Help prevent your guests from losing their personal items. Sometimes it’s easy to misplace things during the hustle and bustle of a party. It’s especially challenging to keep track of your essentials – while spending as much time as possible in the water. To make things less hectic for your guests, set out a wicker basket that they can easily drop smaller items like keys, wallets, or phones in for safe keeping. That way they won’t be fretting over where they put their belongings when it’s time to say goodnight.
3. Create a space for your friends and family. Tell your visitors to leave their beach towels at home! Instead of forcing everyone to lug over all of the pool party necessities, have an area set up with everything they’ll need to get ready for a dip in the pool. Lay out towels, lotion, sunscreen, and even tanning oil so they can freshen up at their convenience. You can even create a mini lounge area with outdoor throw pillows around your pool so that those who are not swimming have a place to rest.
4. Add some light. A super simple way to add some additional ambiance to the scenery around your pool is to light some candles. Use different heights so that they fill space and catch your eye on multiple levels. Or, you can use paper lantern light party strings to add a sparkling effect across your pool and patio. This type of light will cast a very warm glow that adds to the inviting nature of your pool party.
5. Make things easy on yourself. Everyone wants to be the perfect host, but if you’re spending all of your time catering to your friends and family you might not get to enjoy yourself as much as you’d like. But it’s your party, so you should have just as much fun as everyone else! Instead of running back and forth between your refrigerator and the pool for refreshments, why not get an inflatable floating cooler such as this? It bobs back and forth in the pool and whenever anyone needs a drink to freshen up they can swim right over and pull out whatever they’d like. Just stock it up with beverages your guests would enjoy and they’ll have an endless supply of drinks at their disposal.
6. Play games. Pool party games really liven up a pool party. Your pool party doesn't have to be about swimming the entire day. Surprise your friends with some unique pool party games such as Swim Up Blackjack or Pro-Chip Island Pool Golf Game. It’s a great way to bond and have fun at the same time. You can even embrace your competitive side and play in teams! Pool party for kids? Why not try a pool ring toss game or some of our other classic pool games. You need not spend money on pool games; there are dozens of fun and free swimming pool party games that you can play to keep the kids or adults occupied for hours on end.
7. Skip the cliché music. Everyone has an acquaintance who loves to play those tried and true oldies at a pool party. Instead of playing The Beach Boys time and time again, play something that yourself and your friends will enjoy. We have all heard Kokomo and Surfin’ USA plenty of times at the pool and in pretty much any beach-themed movie ever made. Unless that really is your thing, don’t feel pressured to play it just because it’s something everyone will know. Make it your own by playing whatever you like!
8. Create a unique treat. Nothing can compare to swimming on a hot summer day. But you know what makes swimming all the more fun? Ice cream! Not just any kind of ice cream though, but the kind where you get to experiment with your own creations. So why not have an ice cream sundae bar? If you’re looking for inspiration on display, check out this gorgeous exhibition of deliciousness, at eatdrinkchic.com. Doesn't it just look amazing? You can do it yourself too! If you plan to do this or will be featuring other food items, be sure that when you lay out your food you don’t put it all in one area. Instead, have separate stations so people can mingle with each other and aren't all crowded together at one spot.
9. Keep the spotlight on your pool. At the end of the night when three tiered pool fountain, item A5500
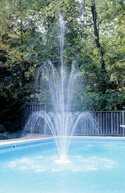
everyone is worn out from a long day of swimming it’s time to kick back and relax. To keep the entertainment going longer, you can turn your pool into a fountain that provides friends with a serene atmosphere while relaxing on the patio furniture. A fountain in the middle of the pool goes perfectly with the pool party theme, but why not take it to the next level by adding an element of style and uniqueness. Try a three-tiered pool fountain to create an elegant look. Or, if you’re more adventurous and like an energetic feel, try this color-changing LED pool fountain.
10. Favor your guests with favors. This step certainly isn’t necessary, but it is a nice way to show that you appreciate your loved ones. Besides, who doesn't like getting cutesy free fun stuff!? Start with a basic beach pail & shovel and build from there. For the young ones, you can add in adorable rubber duckies, colorful sunglasses and beach balls or fun flying disks. Some of these favors you can use for the adults as well. I know I wouldn't complain about getting those cute little ducks! You could also add in some mini bottles of sunscreen, mini fans, paper fans, and some shade umbrellas. The possibilities are endless!
These are just some pool party ideas to get you started on the path to throwing a soirée that will be talked about for years to come! But don’t stop here. There are so many other great pool party ideas out there! 

Swimming Pool Algae: Death by Chlorine

Swimming Pool Algae: Death by Chlorine


picture close up of a green pool algae cell


The worst thing that could ever happen to your pool just did - Algae!What are you going to do? How are you going to stop it? More importantly, how are you going to KILL it?
Sounds harsh, but the truth is, algae can ruin a summer afternoon by the pool (maybe even several afternoons). You don’t own a pool so that you spend your free time getting rid of algae. You bought it because you want to swim in it!
No matter what type of algae has decided to make residence in your beautiful swimming pool, it must be destroyed, and die a thousand deaths with CHLORINE!!!

Chlorine is the ultimate algae killer. It kills:
  • Standard green algae
  • Stubborn yellow (or mustard) algae
  • Even the dreaded black algae.
With that said, you must first determine what type of algae you have.

Standard Green Algae

This type of algae is the most common. It’s green, it’s slimy, and it grows extremely fast in the right conditions. Conditions such as warm water, with high pH levels, and perhaps high phosphate levels. Tends to like the shady side of the pool.

Stubborn Yellow (or Mustard Algae)

Yellow algae is sometimes mistaken for sand or pollen, but if it’s attached to your pool walls or floor and easy brushes off and dissipates into the water, then it’s yellow algae. It’s stubborn because it has a resistance to chlorine and tends to grow back in the same spot if you don’t treat it correctly.
Yellow algae also travels well. It can travel on your bathing suits, floats, and maintenance equipment. All of these must be treated as well as the pool water.

The Dreaded Black Algae

Black algae looks like black spots on your pool wall or floor. We dread them because they have strong roots that grow deep into the surface of your pool, and much like a wart, it can grow back. It’s very hard to get rid of because it requires a good amount of brushing to knock the heads off, so the chlorine can penetrate into the roots.
Black algae, much like yellow algae, travels very well and most likely came from an ocean or a lake. Keep in mind that if you use the same bathing suit or floats in the pool as you do on the beach, make sure you wash and disinfect them before introducing them back into your swimming pool.

How To Kill The Algae

As I mentioned before, chlorine is your best weapon against algae. More specifically, you are going to use calcium hypochlorite pool shock to super-chlorinate your water.
First, let’s determine just how much algae is in your pool. If your pool is very light green or you see very little yellow or black algae, you will need to double shock your pool. That means, using 2 pounds of shock for every 10,000 gallons of water your pool holds.
If you pool is dark green or you see heavy spots of yellow or black algae, you will need to triple shock your pool. 3 pounds for every 10,000 gallons of water.
Finally, if your pool is black or really infested with yellow or black algae, you’ll need to quadruple shock your pool. 4 pounds for every 10,000 gallons.
Note: If your pool is really infested with algae, you might have to repeat the shocking process again the following night to completely destroy the algae.

Here are the steps you should take to kill the algae...

1. Remove all floats from the pool, gather up all cleaning equipment, and sanitize them using a chlorine or bleach solution. Also make sure you thoroughly wash and dry all bathing suits in hot soapy water.
2. Get your water tested to make sure you have the proper pH and alkalinity levels, and that your pool can hold chlorine.
3. Wait until the late afternoon or dusk to brush the entire pool. Paying close attention to hard-to-reach places like under the ladders and creases.
4. Turn on your filter and keep it running 24/7.
5. Shock your pool with the correct amount of shock as we mentioned earlier. Pre-dissolve each pound of shock in a bucket of pool water before broadcasting it throughout your pool. Make sure you cover the entire pool with shock as best you can.
6. Let your pool run overnight. Shocking at night helps the shock to do a more efficient job. Sunlight can eat up 1 ppm (part per million) of un-stabilized chlorine (like shock) every hour.
7. Keep brushing your pool for the next couple of days and brush often. Make sure you keep a good level of pH, alkalinity, and chlorine during this time. It’s crucial.
After a couple of days, if the algae hasn't returned, you’re probably good. Keep brushing for good measure and keep a very close eye on your chemical levels to ensure the algae doesn't make a return.

Finishing Up

At this point, your pool might be a little cloudy. It’s OK. It’s partly dead algae that is causing this. Your filter can do the job of cleaning up the mess you left on the battlefield. Just keep your pump and filter running until your pool is clear. You can add a little clarifier to help speed up the process. Backwash filter very thoroughly when pressure rises.
DE filters should have the grids removed and hosed clean after backwashing. Soaking the grids or filter cartridges in a bleach solution of 1 gal bleach to 10 gals water is recommended for extreme algae conditions.
I hope you can use this method to destroy any algae outbreak that may occur. Your best bet is to keep this from ever happening. Make sure you keep your water chemistry in check and shock your pool once a week with 1 pound per 10,000 gallons of water.
For those with recurring algae blooms, add a Phosphate Remover chemical and follow up with a regular treatment of a good pool algaecide.
If you are persistent in taking care of your pool, you won’t have a problem with algae.

Happy Swimming 

Tuesday, April 5, 2016

Sand and DE filters Multiport valve


Sand and DE filters often use a Multiport valve to reverse the flow into the filter for backwashing. Multiports also offer Waste and Recirculate functions, which can be useful at times. But it also makes the multiport valve a fairly complicated piece of pool equipment.
When a pool filter is leaking, half the time it's actually the multiport valve that leaks. The usual multiport problem is leaking water, or water coming out from somewhere it shouldn't.
So then, today's post is about leaky multiport valve problems and solutions. 6 specific types of multiport valve leaks.
The first thing you need to know is that these small valve leaks aren't going to explode and drain the pool, well probably not. 


Q: MULTI-PORT VALVE IS LEAKING WATER AROUND THE HANDLE

Stem o-rings on the rotor or diverterA: There is always some rain water that collects around the handle, but if water starts to ooze up and overflow onto the lid, you have a common multiport valve leak. Underneath the handle is a large Teflon plastic washer, but this is not the cause of the leak. The handle connects to the stem (with the pin), and on the stem are two small o-rings that seal up to the underside of the cover. These two o-rings, about the size of a quarter, fit onto the stem (which is connected to the rotor, aka footpad or diffuser or diverter), or they fit under the cover. Over time, they may wear out or dry out or blow out, or lose their lubrication. Cold water temperatures will make it worse, as the o-ring can shrink just slightly, or small bits of grit and debris can get wedged up around the stem o-rings, causing leaks. 
MPV key assemblyFor this situation, I would first just reposition the valve. Shut off the pump and push down on the multiport valve handle fully, once or twice. Move it slightly left and right and then back to the Filter position. Use a sponge or leaf blower to remove the water sitting under the handle, and turn the pump back on and see if it still leaks. Often, just re-seating the stem o-rings will seal up a leaky mulit-port lid cover. If that didn't work, then you may have to consider a valve rebuild. The easy route is to buy the 'Key Assembly', which is everything but the valve body, or from the handle to the rotor. The much cheaper way is to remove the key assembly from the valve, and knock out the pin to remove the handle. Then you can pull off the cover, and replace the stem o-rings. Be sure that during reassembly, you orient the cover and rotor to each other in the same direction as before.  

Q: MULTI-PORT VALVE IS LEAKING WATER AROUND THE COVER

A: When the leak is around the outside of the top, where the lid mates with the valve body. The first thing to check is that the system is not under unusually high pressure, from a dirty filter, closed return valves or plugged wall returns. If normal, check that the cover screws are all tight.If it's still leaking, remove all cover screws and pull out the key assembly. Clean, inspect and lubricate the large cover o-ring and place back into the groove in the key assembly. Replace the key into the valve and tighten up the cover screws, then fire-up the pump to check for leaks. Valve cover o-rings don't usually go bad over time, but if it's broken, dry-rotted or damaged, you can replace just the cover o-ring.

Q: MULTI-PORT VALVE IS LEAKING WATER AROUND THE GAUGE

wrap the pressure gauge threads in a clockwise directionA: Another common leak is a small trickle of water running down below the pressure gauge on top mount sand filters. You want to make sure the gauge is firmly held in place, if the gauge were to shoot out under pressure, you could lose a lot of water before discovering the leak. One cause of this is too much Teflon tape on the pressure gauge - years of it! If you're guilty of this, peel off the previous years' layers and lay on 1-2 new layers of Teflon tape (always wrapping the threads in a clockwise direction).
Another cause of a pressure gauge leak on a multiport is that the plastic threads in the valve body are stripped. The valve threads can't be tapped or retreaded, because then the gauge threads will be too small. If you definitely determine that the threads are stripped inside of the valve, you can thread in a Heli-Coil or other 1/4 in-20 thread repair insert, which involves tapping out the hole slightly larger, and screwing in a double threaded 'helix' type of bushing, which gives you new 1/4 in threads for the gauge.
A third cause of the pressure gauge leaking problem is when the valve body is cracked just below where the gauge screws in. This is usually caused by too many layers of Teflon tape on the gauge, and over tightening or cross tightening the gauge. This splits the plastic valve body and causes a leak, but there is a simple repair. Shut off the pump and tighten the gauge more to open up the crack slightly. Clean it out with a toothbrush or small wire brush, and be sure it's dry. Squeeze Super-Glue into the crack, from top to bottom, and quickly unthread the gauge, so the crack will close up. After an hour or so, replace the pressure gauge carefully, after having removed the years of Teflon tape buildup, replacing with 1-2 layers of new Teflon tape or other thread sealant. Be careful not to over-tighten the gauge, just 3 or 4 turns, or until it feels snug.

Q: MULTI-PORT VALVE IS LEAKING WATER WHERE THE PIPES CONNECT

top mount multiport A: Multiport valves have 3 ports, Pump, Return and Waste, where pipes are connected, using 1.5''or 2'' threaded pipe or adapters. At the point where the Pump and Return pipes are threaded into the valve is a common spot for a leak. One cause of this is when a hot pool heater backs up hot water to the valve, which shrinks the PVC connector. In this case, a PVC replacement is in order. Another cause of leaking multiport pipes comes from sagging pipes from movement of the equipment or equipment pad, not very common but it can happen. The most common cause is over-tightening the adapter into the valve, which can cause a crack to appear later during a 'high-pressure event'. Events such as closing a return valve while the pump is running, or starting up the system with plugs in the wall returns, builds up a lot of pressure and could even blow the pipes right out of the valve. 
If the valve body is cracked just below where the pipe screws into the valve, you can replace the valve body, or you can try to repair the crack with Super Glue, as described two paragraphs above. Or, replacing the entire multiport valve may be in order, if the key assembly parts are old and worn.
If the drip is very slow or oozing, you can safely ignore it for awhile. If it begins to saturate the ground under the equipment you may want to take action. You can replace the PVC fittings and some pipe, which you can find at any home or hardware store, along with PVC primer and glue. On the new fitting, smear RTV silicone sealer on the threads and then wrap it 3x with Teflon tape. Hand tighten, then turn with large pliers for another full revolution, being careful not to over tighten. Reconnect the pipes with a coupling or union.

Q: MULTI-PORT VALVE IS LEAKING WATER OUT OF THE WASTE LINE

A: Water is supposed to stop coming out of the waste line after you stop backwashing the filter, but eventually you will notice that water is leaking out the backwash line all the time, not good. First thing I would do is to shut the pump off and push down on the handle fully, turn the valve slightly left and right, and then back to Filter position. Sometimes small bits of debris get stuck between the rotor and spider gasket, and this flushes out the valve. Turn on the pump again to check if that helped. If it still leaks after repositioning the rotor onto the spider gasket, shut off the pump again and remove all of the cover screws, and pull out the key assembly.
inside of a multiport valve, we see the spider gasket in the bottom, looking like a wagon wheelInspect the spider gasket (wagon wheel shape) for wear or damage (note that some Pentair valves have the spider gasket on the bottom of the rotor). If you find that the spider gasket looks good but is just loose, break out the Super Glue or silicone, and use dabs to glue any loose rubber down into the (dry) grooves of the valve body. If the spider gasket looks too far gone, badly twisted and torn, you should replace it. Be sure to use the correct gasket (or use a Valve Go-Kit) for your valve, as they are all different sizes. Scrape out the old gasket with a sharp, small flathead screwdriver, removing all tiny bits of rubber, and glue the new gasket in place (flat side down), using dabs of Super Glue or silicone in the (dry) grooves. Tighten the key assembly in place over the new gasket (no lubrication needed), and you're done replacing a spider gasket.
Multiport valve springAnother cause of a backwash line leaking is that the spring inside of the key assembly has failed. When this happens, your valve handle is floppy and there's no tension when you push down. Chemical corrosion can break down the stainless steel spring over time. Remove the key assembly and look under the lid at the spring to check for rust that has broken the spring's coil. To repair, you can just buy the new key assembly, already assembled, or you can break down the valve and replace the spring. To do this remove the key assembly from the valve, and knock out the pin to remove the handle. Then you can pull off the cover, replace the spring, and while you're in there, replace the stem o-rings too. Be sure that during reassembly, you orient the cover and rotor in the same direction as before.
One more thing - please don't repair a leaky backwash line by gluing a valve on the backwash line! I've done myself before, in a pinch - but it should be avoided; these problems above can cause water to bypass the filter, resulting in poor filtration, and - one time in the future someone is going to forget to open the backwash line before backwashing, which can cause even bigger problems.

Q: MULTI-PORT VALVE IS LEAKING WATER WHERE IT CONNECTS TO THE FILTER TANK

A: Slow seeping weeper running down the filter tank? Top mounted multi ports attach differently than side mount multiport valves, so let's take them each separately.
Top mounted valves used on sand filters, attach to a flange that is molded onto the top of the filter tank. First determine if the leak is coming from between the tank and the flange, or the valve and the flange. If the flange is leaking where it connects to the tank, I'm afraid I don't have much help for you. But if the leak is between the valve and the flange, the first thing to check is the tightness of the bolts or the clamp band (turn the pump off first). Repositioning the clamp band and re tightening can help in some cases. Unlike my many cautions above to not over tighten PVC fittings into the multiport valve body, when tightening clamp bands, there is no such thing as too tight. Tighten down clamp bands until they squeak and creak, often times this will fix a leak between the filter flange and filter valve.
PVC union 1.5in slip x slipIf you can't get the leak to stop, you can pull off the valve to inspect the flanges and flange o-ring. To do this you may need to cut the pipes with a hacksaw, and glue couplings to reconnect the pipes afterwards. If you have unions, or install unions instead of couplings, you can quickly disconnect the Pump and Return pipes (for valve repairs, sand changes, or other repairs). Replace the flange o-ring if it looks dry rotted or damaged. Use lots of pool lube on the oring and flanges to improve the seal and tighten it all up again. If it still leaks, or weeps, check to see if return side pressure can be reduced, by changing filter sand, and/or reducing resistance after the filter with less equipment, straighter runs or larger diameter pipe.
Bulkhead for PacFab filterSide mounted multi-ports, used on sand and DE pool filters, connect to the filter via two (2) Bulkhead Unions, and two sweep arms. DE multiports and Sand multiports are not interchangeable, because they operate in reverse. For sand filters, water enters on the top bulkhead, but for DE filters, water enters the tank through the bottom bulkhead.
side mount multiport valve on a sand filter For leaks on side mount multiport valves, determine if the leak is between the tank and the bulkhead or the bulkhead and the filter. To disconnect a side mount valve from the filter, open the air bleeder and drain most of the water from the filter tank, then loosen the bulkhead union nuts. Pull back on the valve and/or push on the tank to pull them apart, and be prepared to support the valve after pulling it off (cinder block or bucket), to avoid a lot of weight on connected pipes. Inspect and lubricate the o-rings on the valve sweep elbows. Filter tank Bulkheads can be tightened up by turning the large nut inside of the tank, using very large pliers or a strap wrench. Bulkheads also have gaskets and spacers on both sides of the tank wall, that may need service or replacement at some point - which may be after you've tightened the bulkhead, but it still continues to ooze water. Bulkhead parts are considered Filter parts, not Valve parts